The Haptic Creature
The Robot: Fabrication
This page provides a behind-the-scenes look at various stages in the fabrication of the Haptic Creature robot.
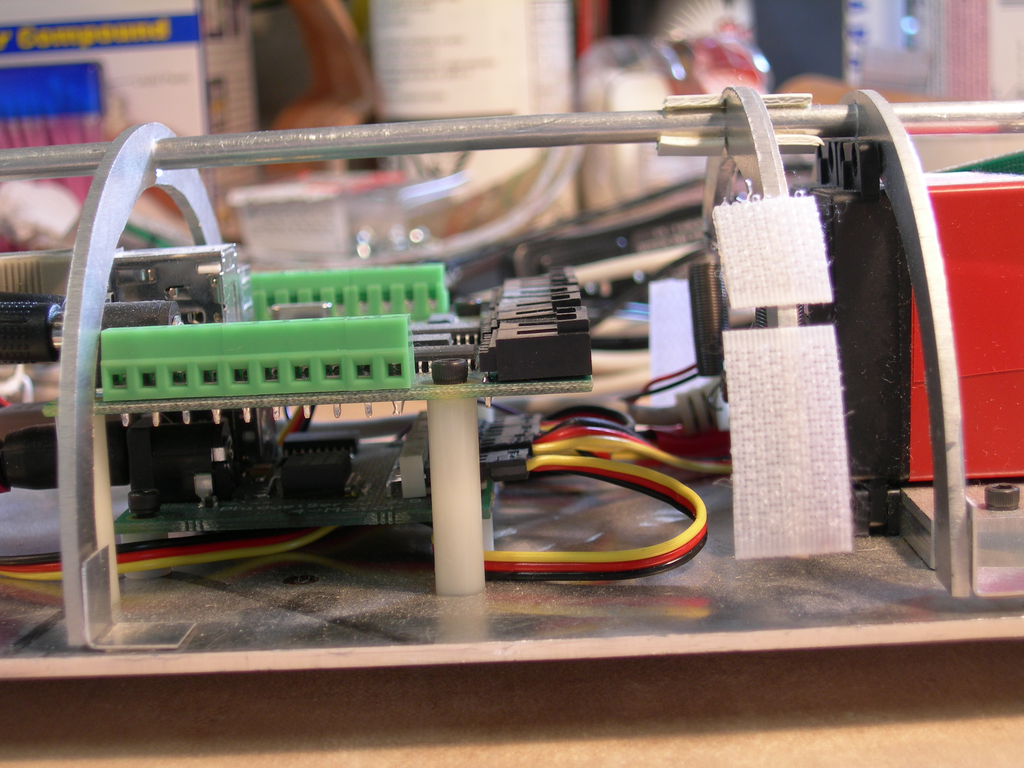
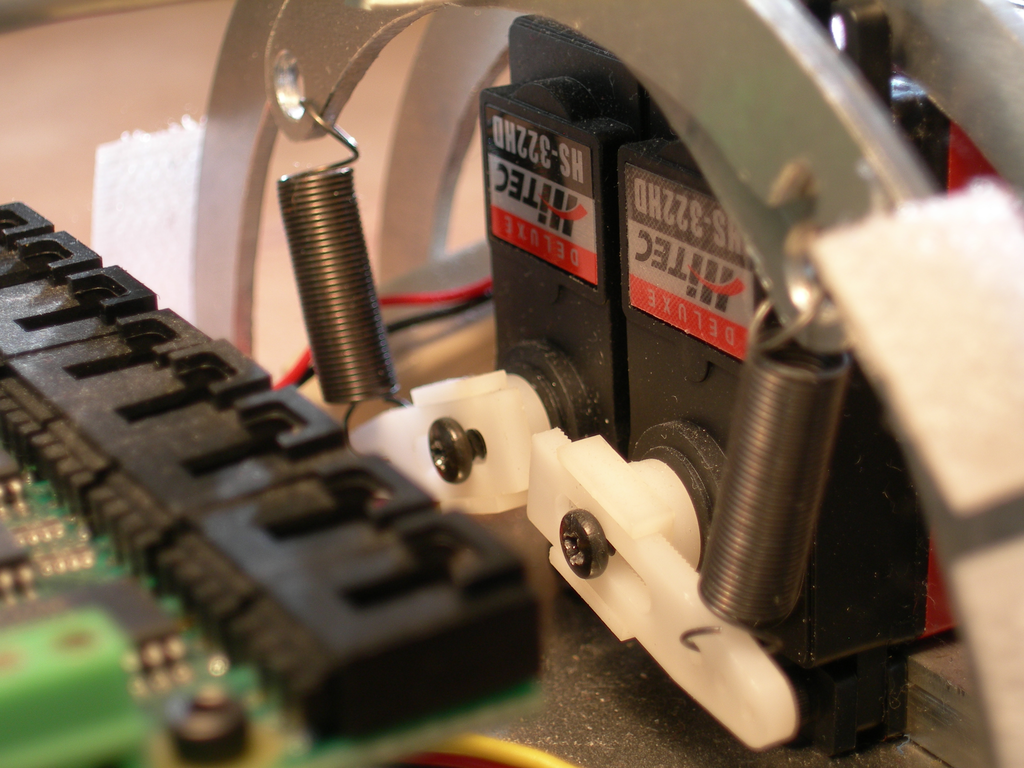
Mechatronics Prototype
Under my supervision, the mechatronics prototype was developed in the summer of 2005 by Tim Oxenford, an undergraduate Engineering Physics student.
The Hapticat prototype was completely human-controlled; with the exception of purring, it contained no mechatronics, and, furthermore, had no sensing hardware. The next step, therefore, was to construct a proof-of-concept automated version. The general goal was to build a computer-controlled prototype with which to quickly explore various aspects of the robot’s mechatronics: sensing, actuation, and communication.
Phidgets was chosen as the underlying hardware platform since, at the time, it provided one of the more flexible and economical frameworks. Ultimately, however, Phidgets proved barely adequate for all but simple configurations. For example, the microcontrollers were slow; the I/O ports were limited; and the communications throughput was slow.
The mechatronics prototype nonetheless was successful as a preliminary automated investigation. It was extremely useful to have electromechanical components with which to test various design ideas.


Touch Sensor Testbed
While I was developing the final version of the Haptic Creature, I built a testbed for preliminary exploration of the FSR (force-sensing resistor) touch sensors.
The testbed contained 20 (1.5-inch) sensors that were arranged in a 4×5 grid. It was constructed of four layers: the top layer was a thin closed-cell foam as a crude approximation of skin; next, the sensors were mounted atop a foam core layer; below this was a thicker open-cell foam to roughly approximate flesh; finally, the top three layers were all mounted to a plywood foundation.
This overall configuration was somewhat arbitrary. I simply needed a platform for early investigation of various factors in touch sensing: electronics, sampling speed, materials.


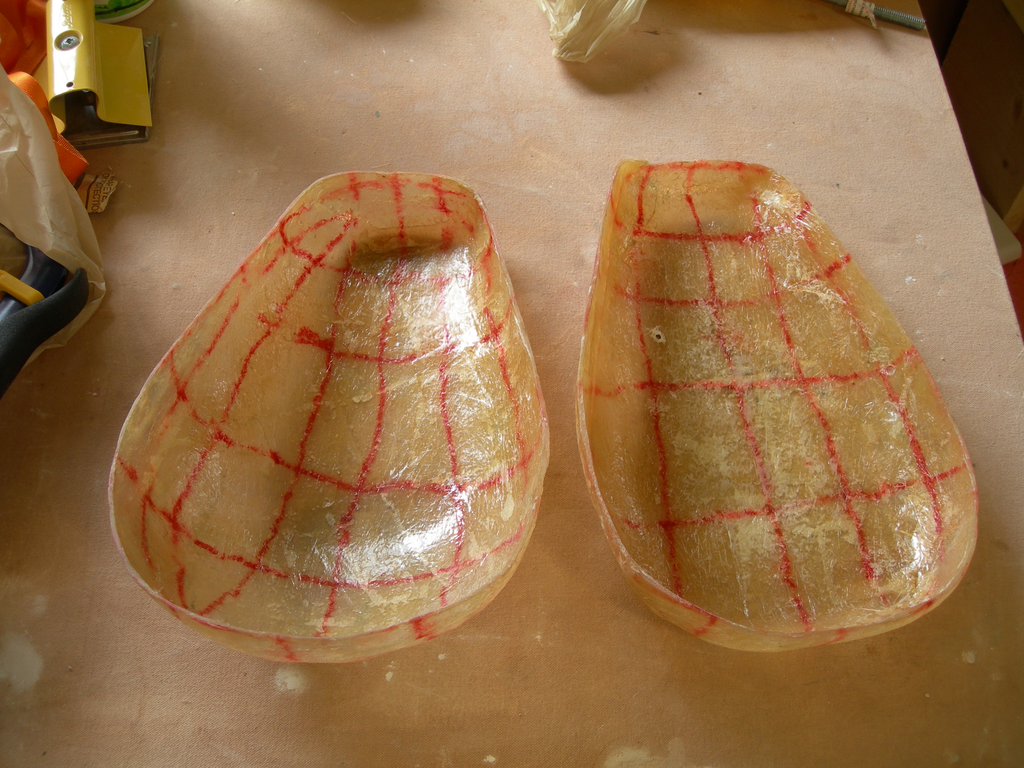
Fiberglass Shell
Fabricating the shell was the first step in the process of constructing the Haptic Creature. Since this was my first attempt both at moldmaking as well as working with fiberglass, the general processes I followed were not necessarily correct nor efficient. Nonetheless, the end product was successful. The following details the various steps.
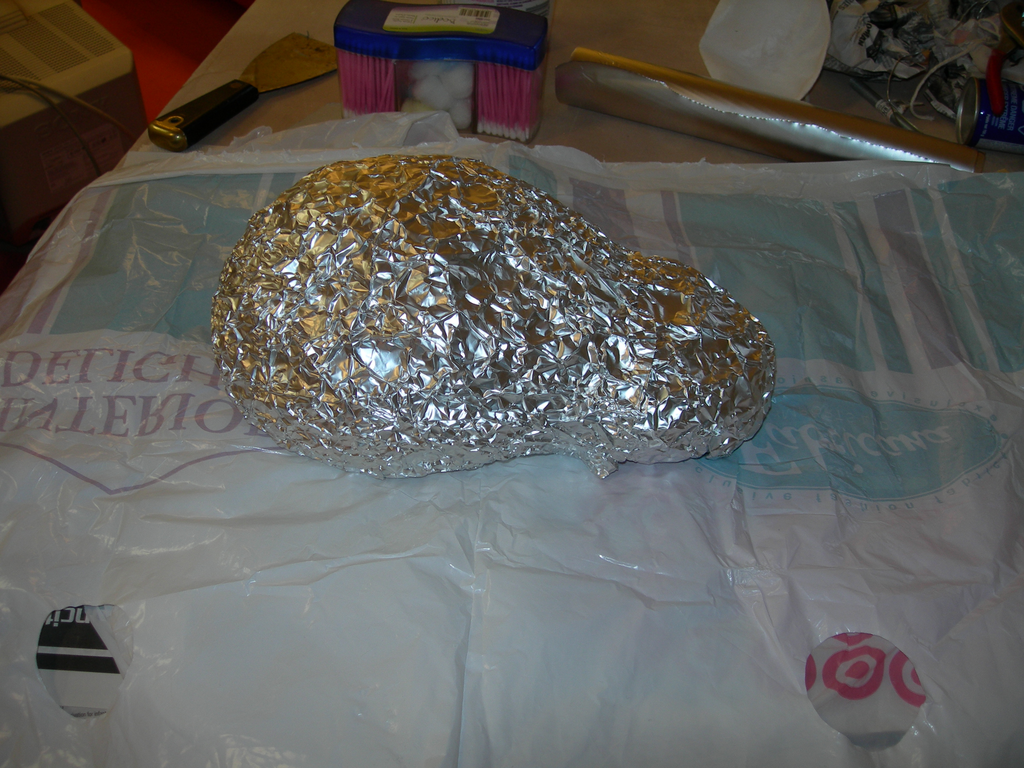
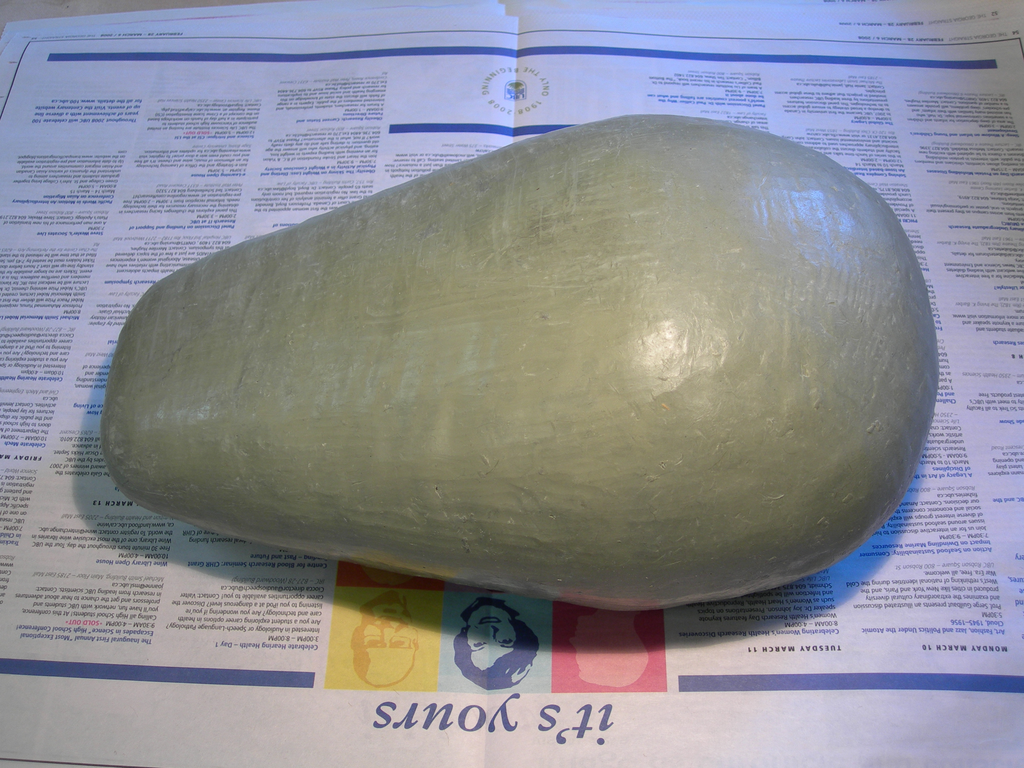
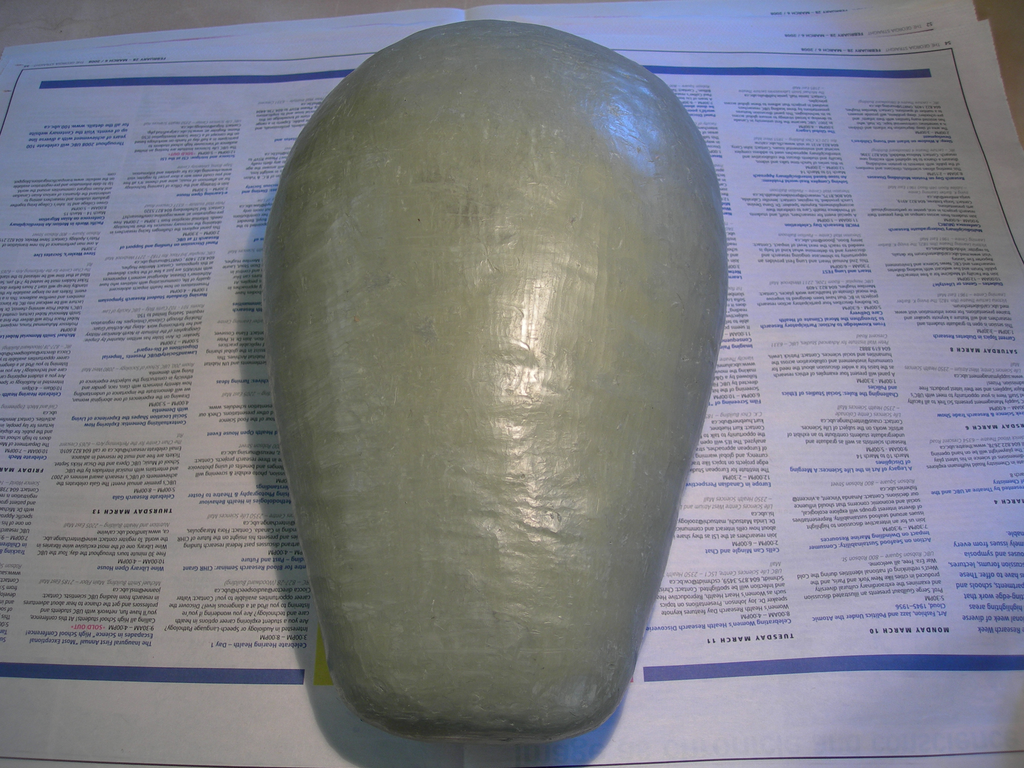
1. Sculpt a Clay Model
To sculpt the positive form, I constructed a rough base from newspaper and covered it with aluminum foil. I then melted modelling clay; poured it liberally over the base; then allowed it to cool and re-harden. Finally, using a variety of sculpting tools, I smoothed and formed the piece.
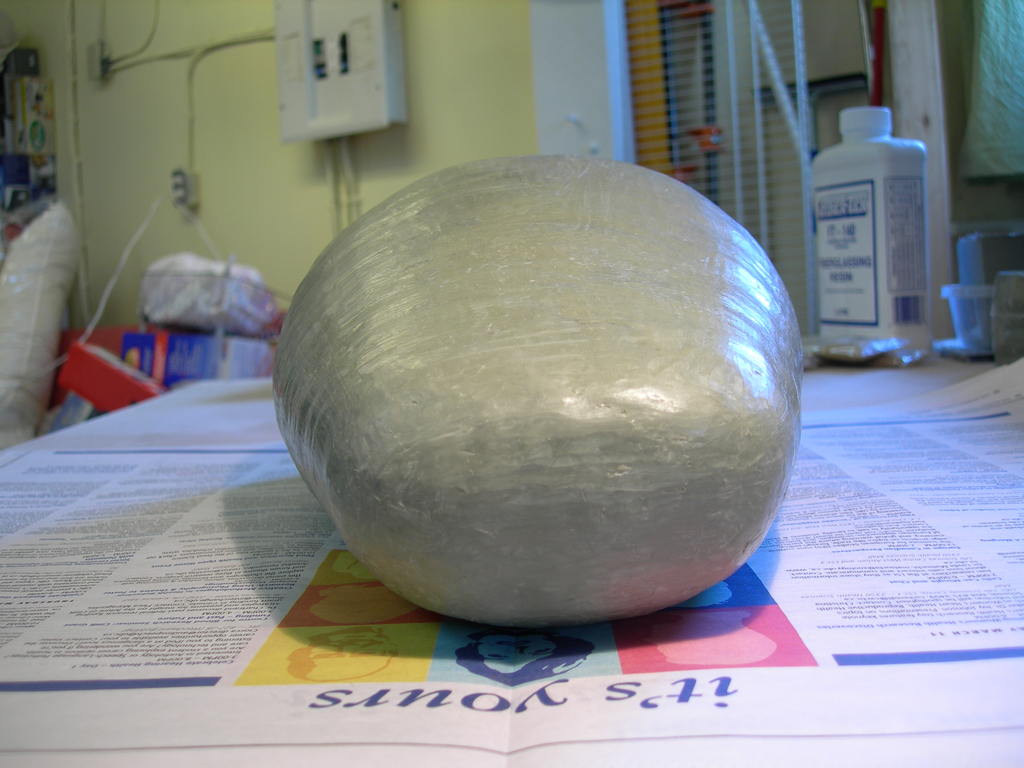
2. Fabricate a Prototype Shell
To fabricate the prototype shell, I covered the clay model in plastic wrap and applied several layers of fiberglass on top. To remove the shell, I split it in half, forming a top and bottom half. Note, however, that cutting the shell inflicted notable damage on the clay model. Finally, I sanded and cleaned the shell halves then sealed both with multiple layers of clear spray-paint.
3. Construct a Mother Mold
I used the prototype shell to construct a mother mold from ULTRACAL® 30 Gypsum Cement.
I reconnected the two shell halves and sealed the seams completely with packing tape then liberally covered the shell in petroleum jelly. Next, I constructed a four-sided wooden box to contain the mold material and placed the shell at the bottom. I then used sculpting clay (not modelling clay) to fill the negative space around the side walls and the bottom half of the shell. I added two small positive shapes protruding from the clay to act as keys to help center and lock the resultant mold halves.
I mixed the ULTRACAL 30 mold-making compound and poured it over the top half of the shell in the box, adding ample extra material on top. After the material set, the container was flipped over and the clay filler removed from the bottom. I liberally covered the exposed concrete in petroleum jelly then again mixed the ULTRACAL 30 and poured it over the bottom of the shell. After the material set, I unscrewed the four sides of the box; separated the two halves of the mother mold; then removed the prototype shell.
4. Cast a Robust Positive Form
5. Form the Final Shell